The purpose of this blog is to help the community with some of the little things I have found over the years which can hopefully save you all some heart ache. The aim is for the tips to be short, sweet and straight to the point. I currently work in the virtual production world so most of these tips will revolve around getting assets into Unreal Engine. I mainly use Houdini for the creation of content but will occasionally touch upon other software's.
Recently I got fascinated by the movement of ants and their behaviour. This led me to this video by Sebastian Lague. Here he discusses in depth the behaviour and how it can be coded. So I decided creating this in Houdini and in 3d would be a fun challenge. After many days of making my particles all swarm into a chaotic ball, I stumbled across an Entagma tutorial that solved all my problems.
So this brings me to the volume. The volume is created by each particle leaving a trail(value in the volume) which other particles would be attracted too(ant behaviour).
I have been using unreal as a final output for many of my recent projects so to continue my learning this was the preferred choice. Adding a volume from Houdini is pretty straight forward but there is not much documentation showing this.
Ryan Brucks has some brilliant documentation showing the theory behind this but this post is over 5 years old at this point and I was convinced there was an easier way. I will be utilizing the volumetrics plug-in in unreal which seems to have been derived from the concepts Ryan discuses. I don’t have any confirmation if this is true but the nodes are identical.
In Houdini, SideFX labs have nicely packaged up a volume export node. This will create an exr texture sheet sequence of your volume at incremented cross sections. Below are the settings I used to export:
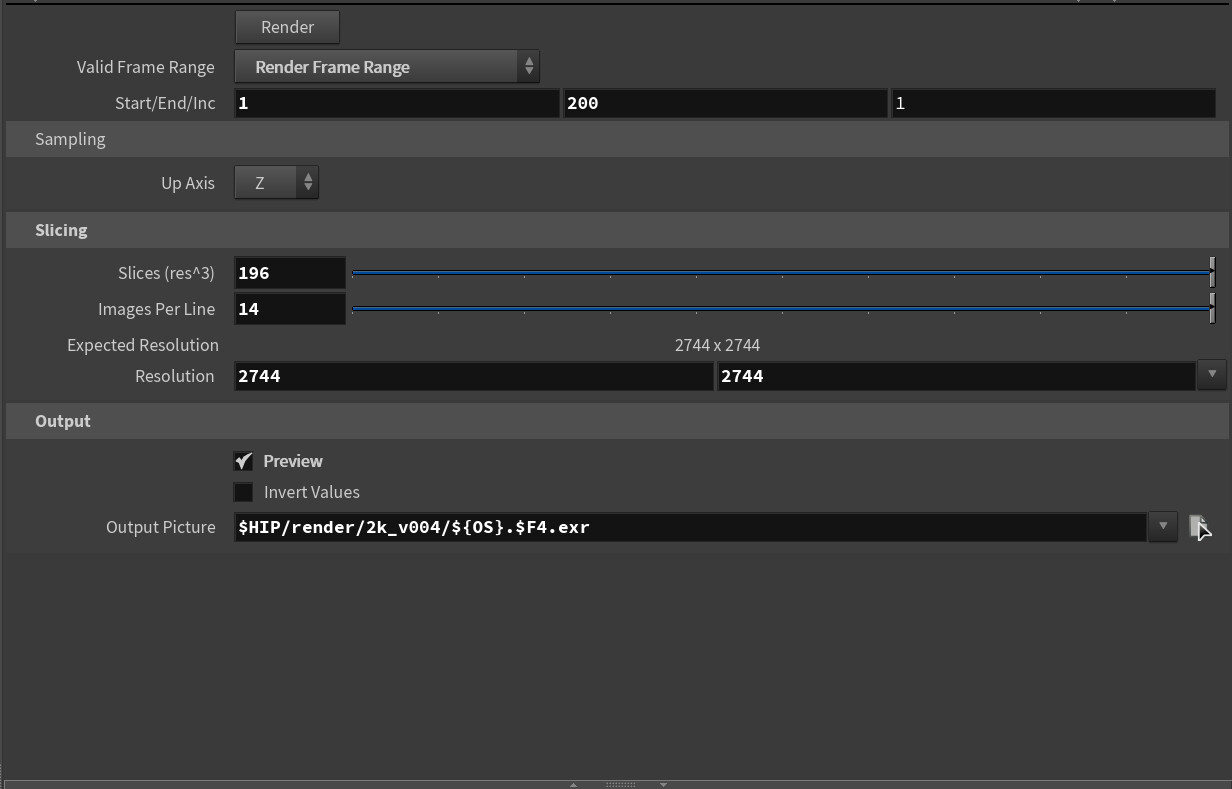
Things to be aware of:
- The 5832 resolution crashed my unreal on import using a sequence. I didn't try a single image at this resolution.
- 2744 resolution worked fine with an image sequence and had pretty good results.
- I had an issue where my volume was jumping around in unreal. This was due to the bounds being scaled from within the export node in Houdini . To resolve this, right click on the node and allow editing of contents. Where it says prep volume we can replace the bounds node with our own bounds. This will lock it in place. See images below.
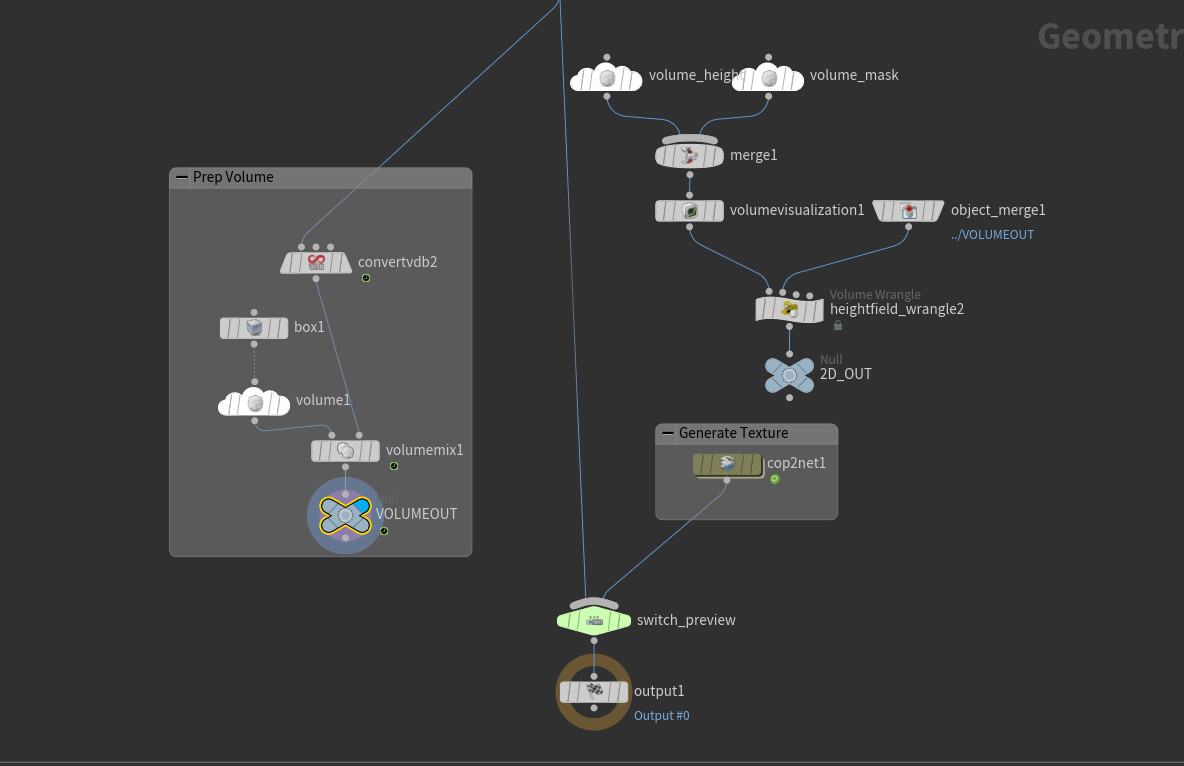
Above is the tweaked Volume Export node. I swapped the volume bounds for my own pre-set box. The size of this is my original bounds for my simulation.

Above is what the default node is like when you dive inside.
We can now import our texture sheet into Unreal Engine as image sequence.
When in Unreal Engine the first thing to do is make sure the volumetrics plugin is enabled. This will load the required shaders we need to insert our volume texture sequence. These shaders can be found under;
/Volumetrics/Content/VolumeTextures/Materials/Raymarching/M_VolumeRayMarch_Lit_Preview
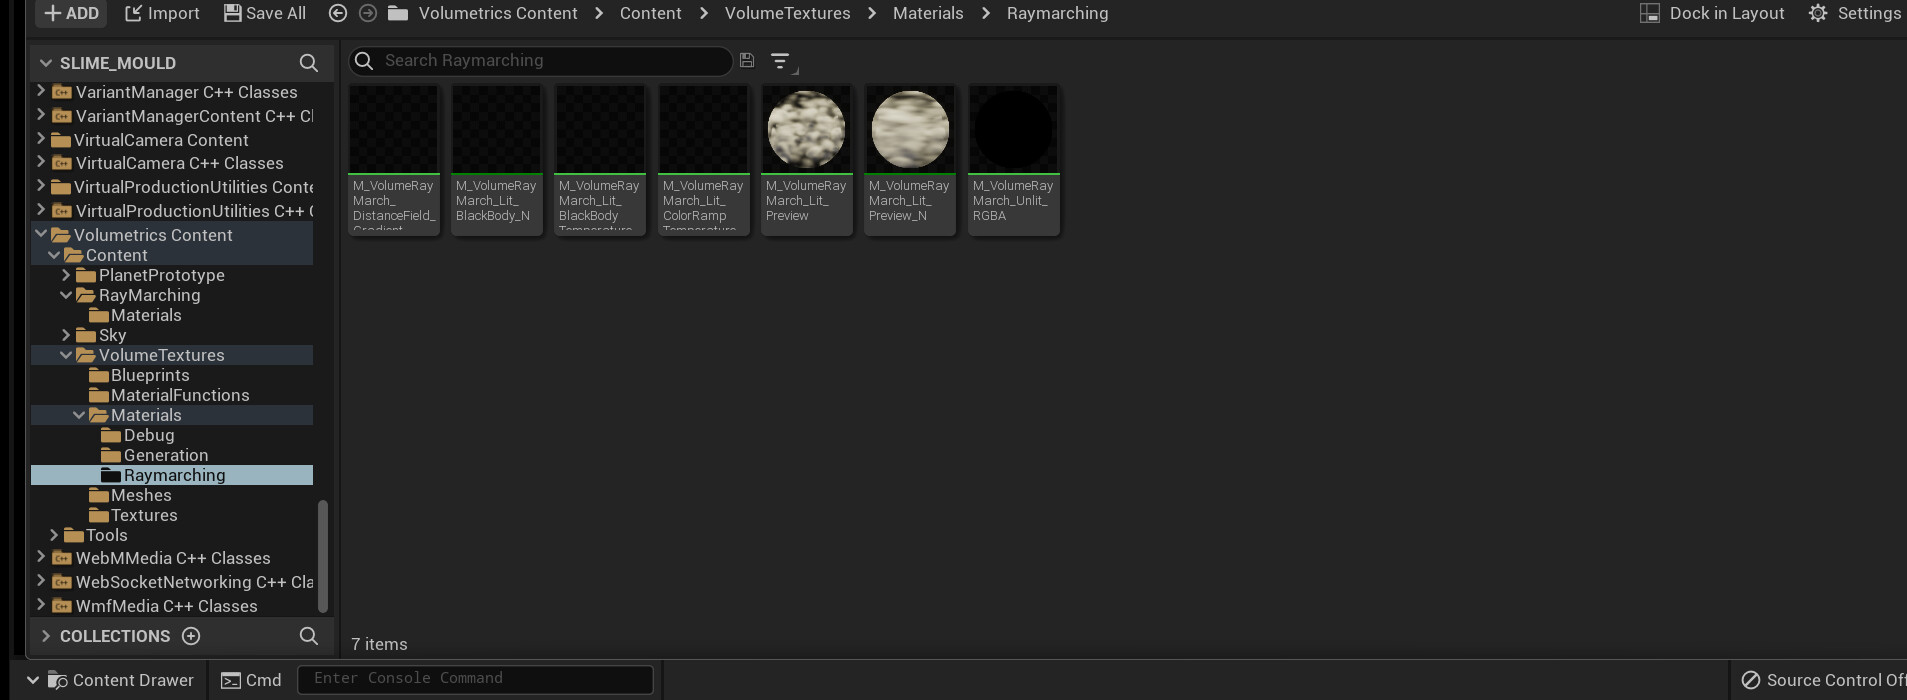
If this path is not visible you can make it visible by using the setting dropdown in the content browser and check “show plugin content”.
I usually duplicate the material instance and move it to my root content folder.
Importing the volume texture sheet sequence is as follows;
-In the content browser we want to right click and add a media IMG source.
-Double click on this and link your exr sequence.
-in the content browser right click and add a media player. Check the box that prompts you to create a media texture. Double click and choose the Media IMG Source(EXR sequence) as the source.

This is what the volumetrics folder of my project looks like. Red is the copied materials from volumetrics plugin folder. Blue is my media texture source, player and render output. Black is the copied mesh used in the scene also copied from the volumetrics plugin folder. At /Volumetrics/Content/VolumeTextures/Meshes/S_Box_InsideOut_01.
We can now link our media texture to our material and tweak some parameters.
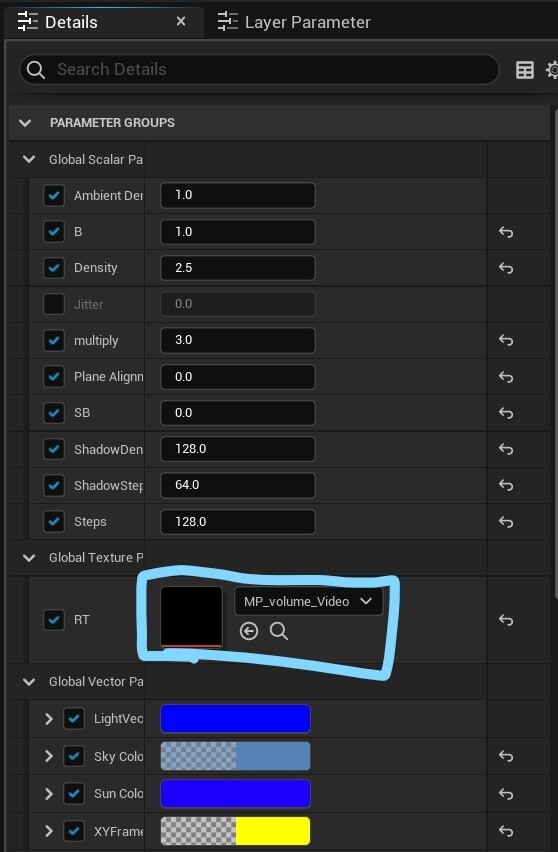
Depending on the density of your volume out of Houdini you may need to tweak these parameters but these settings worked for me.
Simply drag the inside out box into the scene and add our created material instance.
And there we have it! Animated volumes exported out of Houdini and into Unreal Engine.
If I missed something or there is a better way of doing things please let me know.
In the next post I plan to discuss how I get Houdini particle simulations in to Unreal using Niagara.
Cheers
Liam